• Home
  • About
  • Blog
  • Occasions
  • Wedding
  • Corporate
  • Workshops
    • Melbourne
    • Online
  • Contact Us

How to Decorate a Mini Heart Dress Tutorial

July 1, 2015

This design is one of our popular ones for wedding bombonieres and it’s actually really simple to do just like the previous How to Decorate a Mini Heart Tux Tutorial.

It’s a great design for beginners to try because it does not involve a lot of steps and it’s very quick and easy.

Here’s what you will need for this tutorial:

  • Mini Heart Cookie Cutter
  • Wilton Set of 8 Icing Colors (you only need to use pink for this one)
  • Piping consistency royal icing
  • Flooding consistency royal icing
  • Decorating nozzles tip 2 –Tala Original Icing Tubes – No.2 Writer Medium Piping Nozzle.
  • Skewer or chopstick (to spread the flood icing)

Food and Safety Handling Certificate

June 24, 2015

When my sister and I decided to start a gingerbread cookies business in our home kitchen, we were advised by the council that one of us would need a Food Safety Handling Certificate in order to run this business.

minions_edited

So it was decided that I (Michelle) would go take the course and luckily it was not a lengthy process. It only took one day to do the course, I have only had to do it once and it cost less than $100.

It was a pretty simple course, they went through the material and then we had a test on everything that we just learnt. After you passed the test, you were given your certificate straight away.

Click here to book in your Food and Safety Handling Course.

How to Decorate a Mini Heart Tux Tutorial

June 17, 2015

This design is one of our popular ones for wedding bombonieres and it’s actually really simple to do.

It’s a great design for beginners to try because it does not involve a lot of steps and it’s very quick and easy.

Here’s what you will need for this tutorial:

  • Mini Heart Cookie Cutter
  • Wilton Set of 8 Icing Colors (use white and black)
  • Piping consistency royal icing
  • Flooding consistency royal icing
  • Decorating nozzles tip 2 –Tala Original Icing Tubes – No.2 Writer Medium Piping Nozzle.
  • Skewer or chopstick (to spread the flood icing)

How to Decorate an Elephant Cookie Tutorial

June 11, 2015

This is such a fun and quick tutorial that you can do yourself over and over again.

There are very few steps involved so it won’t take up too much of your time. It does involve a heart stencil for the elephant’s ear but you can make the stencil out of paper and then throw it away once you have used it.

Here’s what you will need for this tutorial:

  • Elephant Cookie Cutter
  • Heart- shape stencil
  • Wilton Set of 8 Icing Colors (we used blue and green but you can choose any color you like for your elephant)
  • Piping consistency royal icing
  • Flooding consistency royal icing
  • Edible Pen – We use these FooDoodler Food Coloring Markers – 10 Colors – Kosher (1, A)
  • Decorating nozzles tip 2 –Tala Original Icing Tubes – No.2 Writer Medium Piping Nozzle.
  • Skewer or chopstick (to spread the flood icing)

How to Decorate a Smiley Face Cookie Tutorial

June 10, 2015

We always like to make these ones for the market because it’s really simple but people really love the design because it’s cute and playful.

It’s a great design for beginners to try because it does not involve a lot of steps and it’s very quick and easy to do.

Here’s what you will need for this tutorial:

  • Mini Circle Cookie Cutter
  • Wilton Set of 8 Icing Colors (you can choose to use any color for your smiley face)
  • Piping consistency royal icing
  • Flooding consistency royal icing
  • Decorating nozzles tip 2 –Tala Original Icing Tubes – No.2 Writer Medium Piping Nozzle.
  • Skewer or chopstick (to spread the flood icing)

For more tutorials please join our Newsletter below:

Subscribe to our mailing list

* indicates required


How to Flood a Cookie without an Outline

June 7, 2015

This is our very first video tutorial that we have put up. A very quick and simple one for everyone to learn, enjoy.

How to Flood a Cookie without an Outline – Tutorial

Icing Consistency

June 6, 2015

We have been asked a number of times by our customers at the local markets about how our royal icing stays on the cookie and doesn’t run off. Well the answer is in the consistency of the icing and less about the ingredients which is a standard royal icing ingredients that you can get from anywhere.

Here is a simple royal icing recipe you could use.

TIP: Add the water gradually, it is better to have a thicker royal icing mix to begin with because it will be easier to change the consistency by adding more water later.

There are basically 3 different consistency of royal icing we use for outlining, flooding and intricate detailing known as the twenty second icing as name by one of our favorite cookie decorators Sweet Sugarbelle which can be found here.

Once you have chosen your royal icing recipe that doesn’t need to be adjusted in order to start decorating cookies, instead you need to adjust the consistency (in other words the thickness) of the icing to do different things.

Bonus image GC

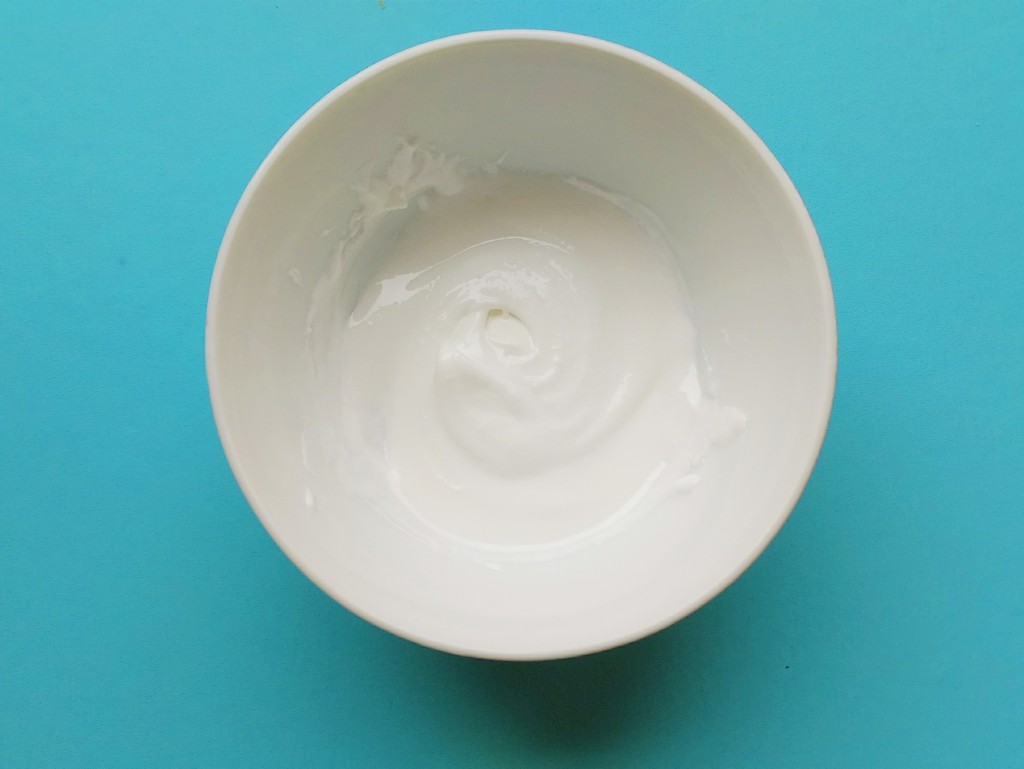
Normally, you begin by using piping icing to outline the cookie.  This creates a border to make sure the icing does not flow over the edges. The consistency of the outlining icing could be described as toothpaste, if you are using an icing bottle and you hold the bottle upside down the icing will start coming down but at a very slow pace. Another way to test the consistency of the icing is while the icing is in a mixing bowl run a spoon through the middle of the icing it should take about 10 seconds for the line to disappear.

Outline Icing

Outline Icing

After the cookie is outlined, a thinner version of the same icing is used to fill the outlined area.  This is called FLOOD icing.  We usually fill the middle of the cookie and to cover it to the edge we use a chopstick to cover the edges so it doesn’t overflow. The flooding icing should flow a bit like shampoo and if you run a spoon through the middle of the icing it should take about 5 seconds for the line to disappear.

Flood Icing

Flood Icing

Finally to add intricate details to your cookie such as writing names, making drop flowers, features on faces or basically anything that requires the icing to be firm and stay in place we use the 20-second icing consistency which is the thickest out of all the consistency and if you run a spoon through the middle of the icing it should take about 20 seconds for the line to disappear and it requires the most pressure to pipe the icing out of the bottle/bag.

20 Second Icing

20 Second Icing

Mastering consistency is the single most important cookie making skill.  Once you have mastered this skill through a bit of trial and error you should be able to achieve most effects on your cookie decorating adventure.

Just a few more tips before I go:

  • Use another squeeze bottle with a small nozzle to add more water to your icing, you don’t want to overdo it and make it too runny, however if you do add too much water don’t panic make sure you have some spare icing sugar and add a few teaspoons of it in to thicken it up again.
  • Play around with the consistency, depending on the temperature in the air sometimes you need thicker or thinner consistency and what works for us, maybe not work as well for you.

Feel free to add any tips you might have, or ask questions.

8 Must - Have Tools to become a Pro Cookie Decorator

Do you want our free guide to learn to become a cookie decorator?

I agree to have my personal information transfered to MailChimp ( more information )

I will never give away, trade or sell your email address. You can unsubscribe at any time.

Simple Photo Editing

April 5, 2015

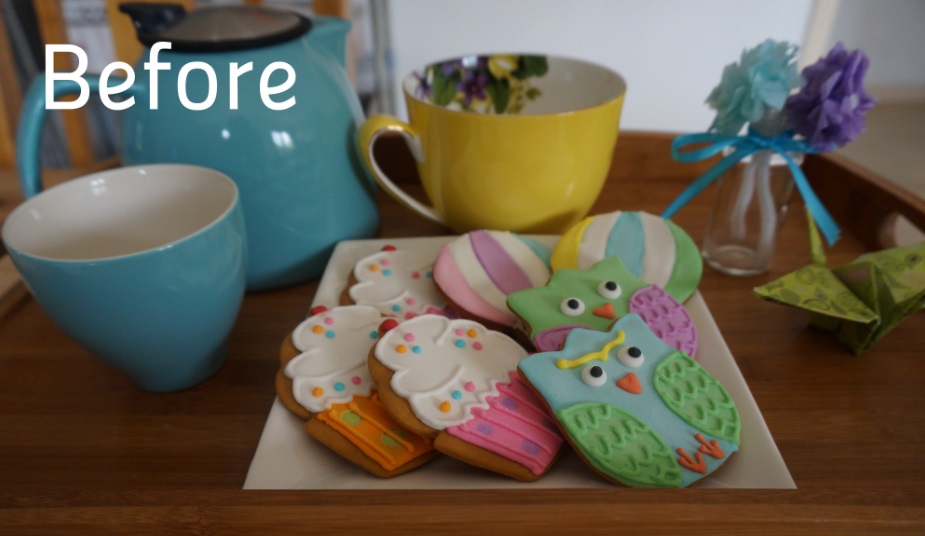
Since our customers rely  heavily on what our gingerbread cookie designs look like, photos of our product is a very important part of the business. But these days you cannot just use a raw image, in order to make it more appealing to customers, a bit of photo editing is required.

Now I never go overboard with the photo editing because I believe the idea of it, is just to bring out the best aspects of a photo. It is not to completely change the product into something that it is not (ie the controversial photo shopping of cover models).

My favorite photo editor to use is Pixlr, it is a free online photo editor which is simple to use and it gives you the option of using the advanced editor or a easier express version.

For photos on the website I never like to use a filter, I prefer the “white light” look. Whereas for photos on social media such as Instagram, I say go crazy with the filters.

So there are only a few things I like to adjust on each photo using Pixlr Editor:

– Blur the background so that your product is the only thing in focus

– Increase the brightness

– Increase the contrast

– Increase the color vibrance

– Increase the saturation

edit before1 words

edit after

The levels of adjustment depend on the quality of the original photo taken. For Gingerbread Corner as long as there is good lighting in the original  photo, then I can work with it.

My sister and I are not professional photographers or editors we  only know the pure basics, which works for our business. So our suggestion to you when it comes to photo editing, is to play around with it and have a look at other businesses and their photo standards to compare and replicate.

To get more tips from Gingerbread Corner, please sign up to our email list

Subscribe to our mailing list

* indicates required


The Squeeze Bottle

March 12, 2015

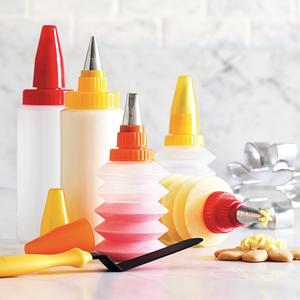
squeeze-bottlesImage Source

We cannot live without a SQUEEZE BOTTLE. Why I hear you ask? Well it’s because this is the only tool we currently use for piping our icing onto our cookies.

When it comes to cookie decorating with royal icing there is a few different choices on what you can use to transfer icing onto our cookie. Traditionally you might have used those material icing bags.. in our modern era there is disposable icing bags also available for your use. We haven’t yet ventured to icing bags just yet but this will be something we will look into in the near future as we’ve found that certain techniques such as creating ribbon flowers, drop flower, fine lines that require a No.1 nozzle will be much easier on the hands if we used an icing bag instead. That being said, to date the squeeze bottle is our bread and butter.

Here is a list of pros & cons for the squeeze bottle:

Pros:

Re-usable

The tops of these bottles allow you to change different nozzle sizes easily

Less messy to store when you’re not using it as it stands upright on its own

Probably cheaper in the long run compared to disposable bags ( and possibly better for the environment since we are not throwing away as much plastic but kind of counter this with a bit more water usage from washing them, you be the judge)

Easier to hold in our hand (especially the mini bottles)

Cons:

Very thick icing is very hard to squeeze out which make certain techniques hard

You have to clean them each time

Hard to find in Australia

Bonus image GC

Now if you want your own squeeze bottles to start decorating they are sometimes available at your local House or Matchbox, especially during the festive season.

squeeze bottle

Image Source

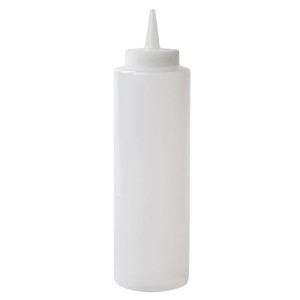
They come with their own large nozzle (which we use for flooding) and a lid to keep the icing from drying out. The opening of these bottles are great because they are fairly large, which makes it easy for us to get the icing in by just pouring it in and therefore it’s also easier to get the icing out and clean it. The downfall however to these bottles are that they are tougher to squeeze so that the hands can start hurting if you are using it for detail work and have thick icing in them. So we tend to use these for flooding

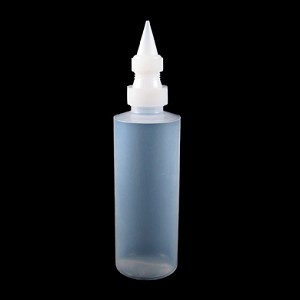
Now if you can’t find them in a store then online is another option, there are always squeeze bottles available on ebay or online shops. Finding squeeze bottles in Australian online shops have proved to be a bit difficult but some are available at Sweet Themes. They have the 8-oz squeeze bottle with a lid which we find best for flooding as they come with a fixed nozzle (Picture below) and also easy to fill and clean.

8-oz-squeeze-bottle-clear-6-pack

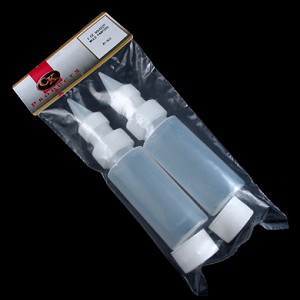
Alternatively if you are not in a rush for your squeeze bottles (and the Aussie dollar stays strong) buying online from US stores are a very good option. Our favourite resource for anything cookie related is Karen’s Cookies. Our favourite squeeze bottles to buy from Karen’s cookies are the 2oz Squeeze bottles. We have at least 8 of them and seem to use them all the time. They are great for when we want to do outlining and detailing on our cookies because you only require a small portion of icing. Also they are soft enough to squeeze and easy to clean.  These bottles also have the interchangeable tops so you can use any nozzle size on it.

squeeze bottle 2

Image Source

Hopefully this has been helpful for your own cookie decorating adventures.

We have done a bit of searching and found that you can get these bottles on Amazon for good prices.

8 Must - Have Tools to become a Pro Cookie Decorator

Do you want our free guide to learn to become a cookie decorator?

I agree to have my personal information transfered to MailChimp ( more information )

I will never give away, trade or sell your email address. You can unsubscribe at any time.


  • < Previous Page
  • 1
  • 2
  • 3

Welcome

Welcome

We are 2 sisters (Janet and Michelle) who were working the typical 9-5 office job. But we knew we wanted to do something we were passionate about...read more

Categories

  • Birthday
  • Blog
  • Christmas
  • Corporate
  • Easter
  • Halloween
  • Mother's Day
  • Oktoberfest
  • Tutorials
  • Wedding

Subscribe to our Email List

Privacy Policy

Contact Us

  • Facebook
  • Instagram
  • Pinterest
  • Twitter
  • YouTube

Copyright © 2025 . Site Design by Pish and Posh Design Studio.

Insert/edit link

Enter the destination URL

Or link to existing content

    No search term specified. Showing recent items. Search or use up and down arrow keys to select an item.